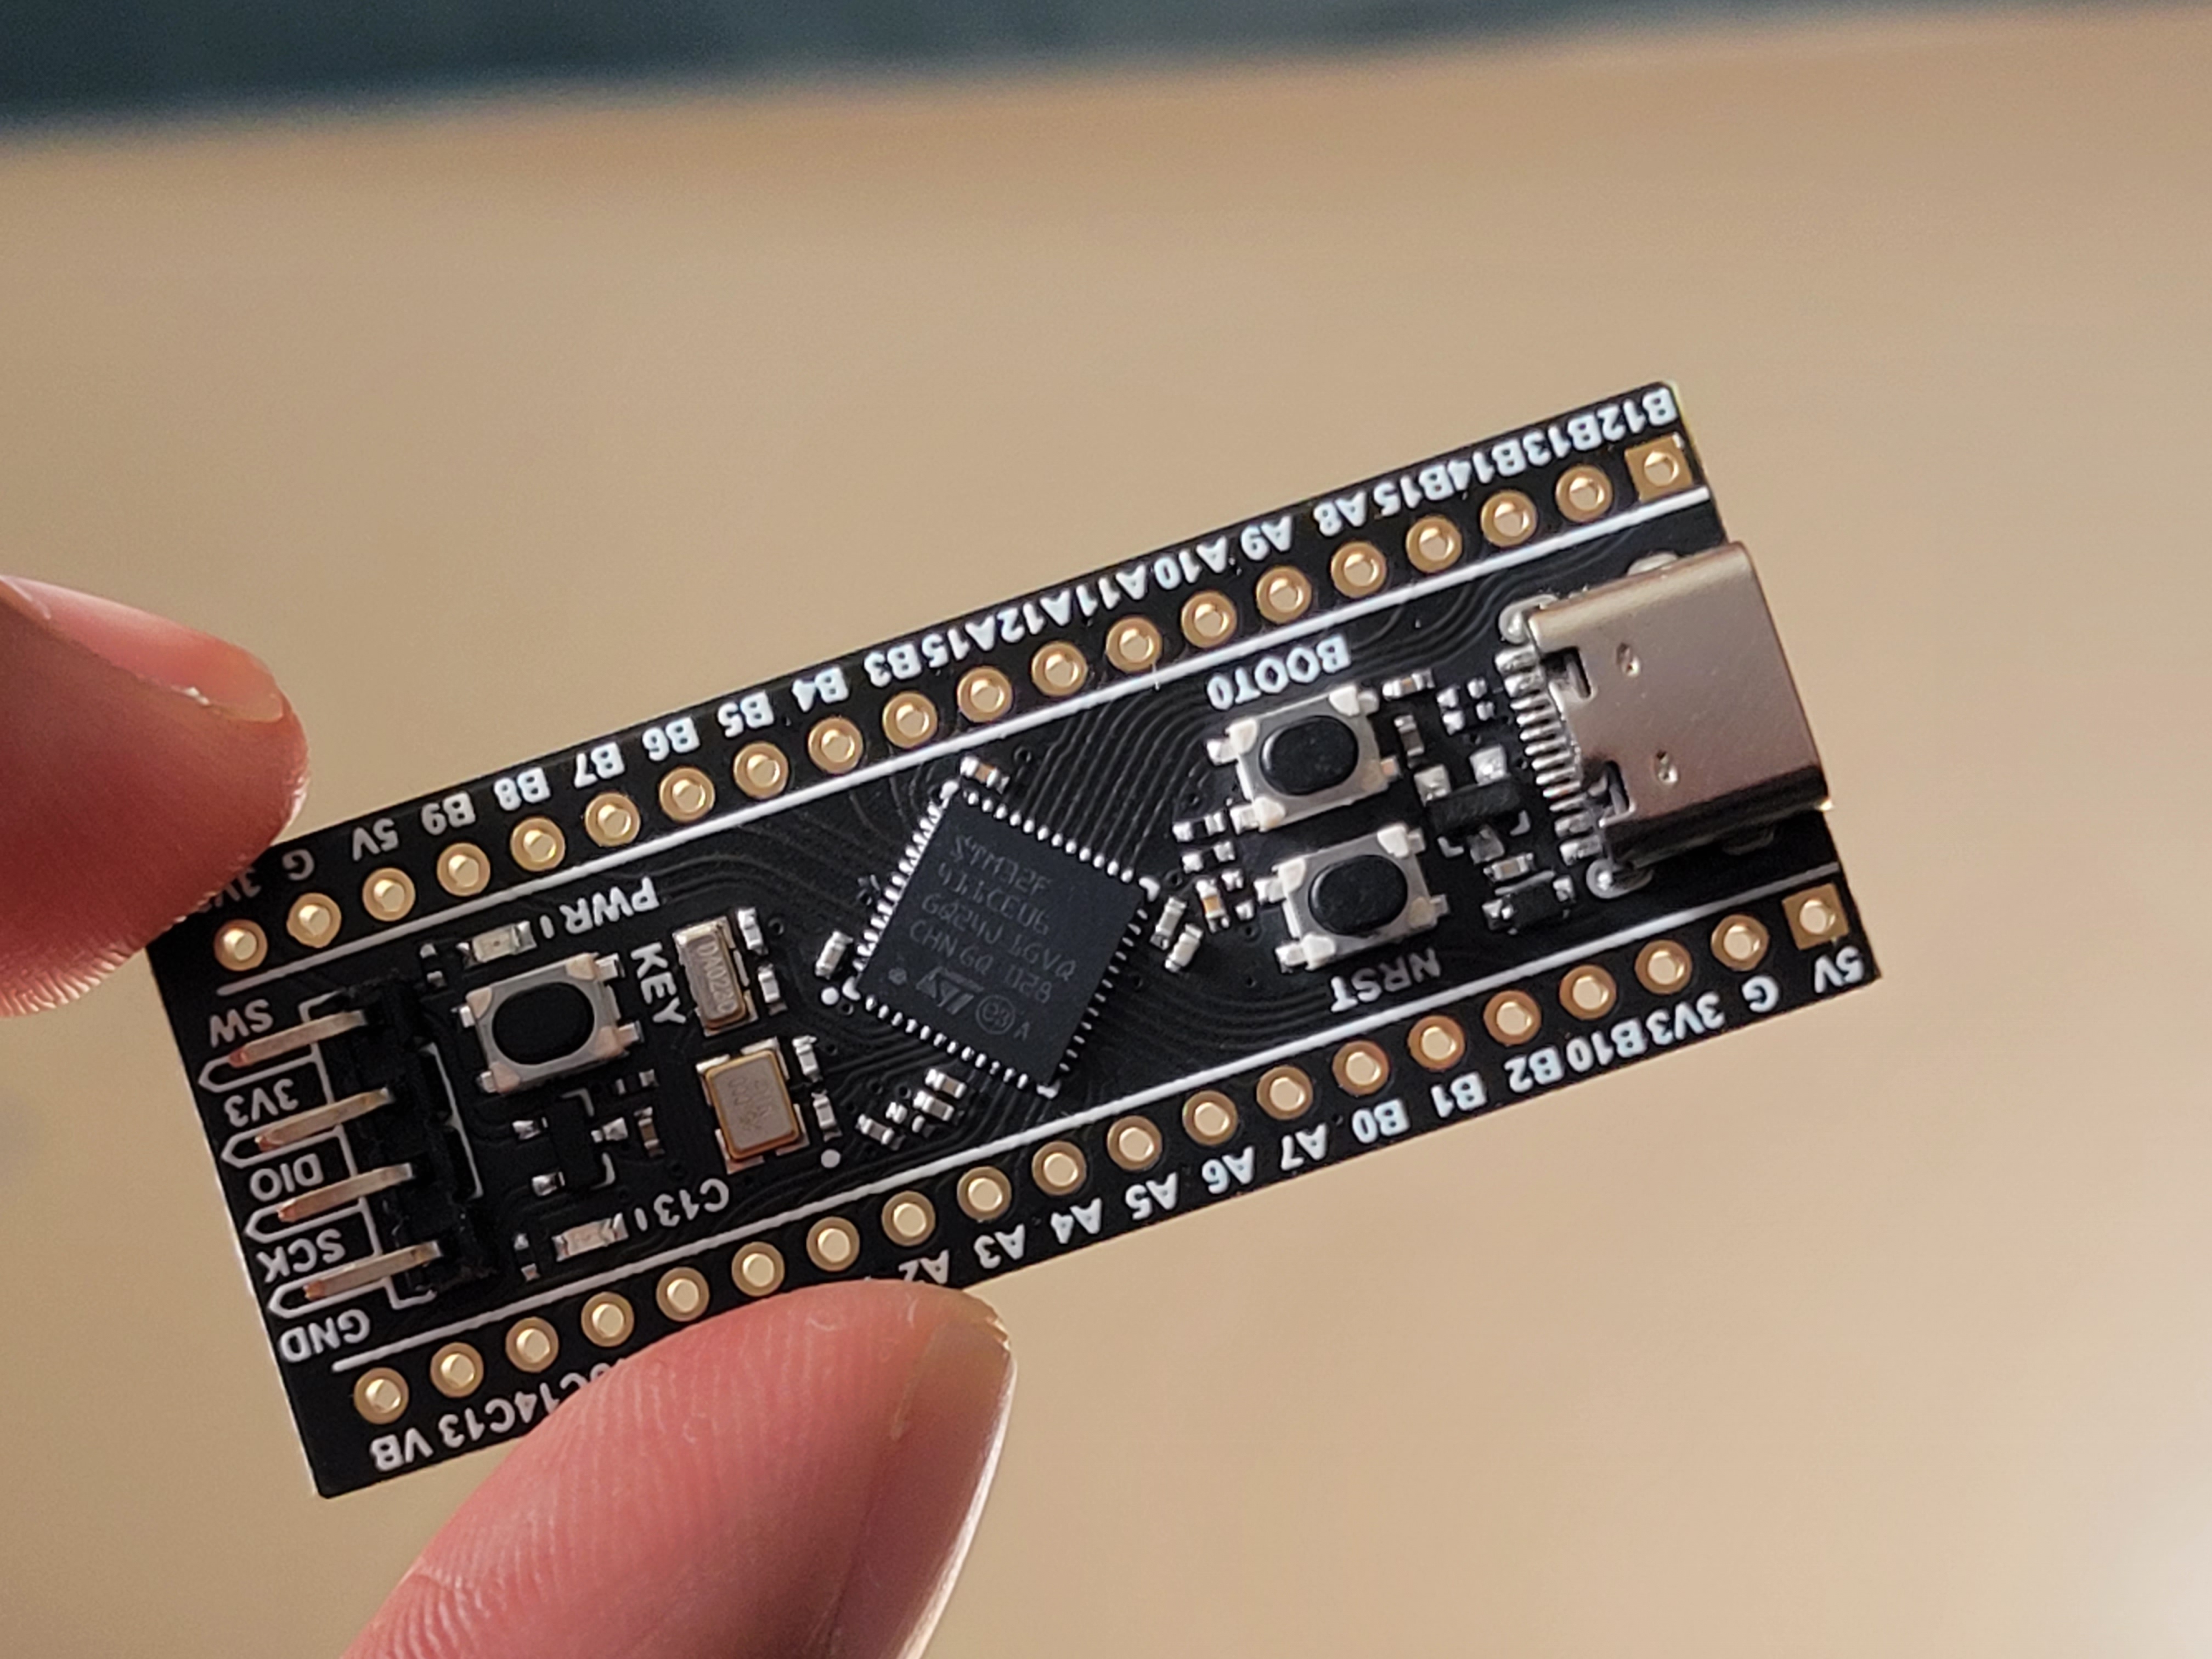
I recently purchased a STM32f411 from Adafruit . This board is also known as the “blackpill” and is manufactured by WeAct Studio . The board has the STM32F411CE MCU which operates at a max frequency of 100 MHz.
This was my first time venturing outside of the Arduino ecosystem, and I ran into a lot of unclear documentation and steps along the way. Hopefully this getting started tutorial will help others avoid spending hours on getting the basics setup.
Programming the STM32F411
The STM32F411 is a 32 bit ARM CPU. If you’re used to working with 8-bit microcontrollers like the Arduino Uno (Atmega328p), this is going to be a huge upgrade in terms of performance, memory and just overall capability. However, programming this device is slightly different from your typical Arduino device. For starters, you can’t just plug this in and open it up in Arduino like you could with other devices. All ARM chips usually require a JTAG/SWD debugger.
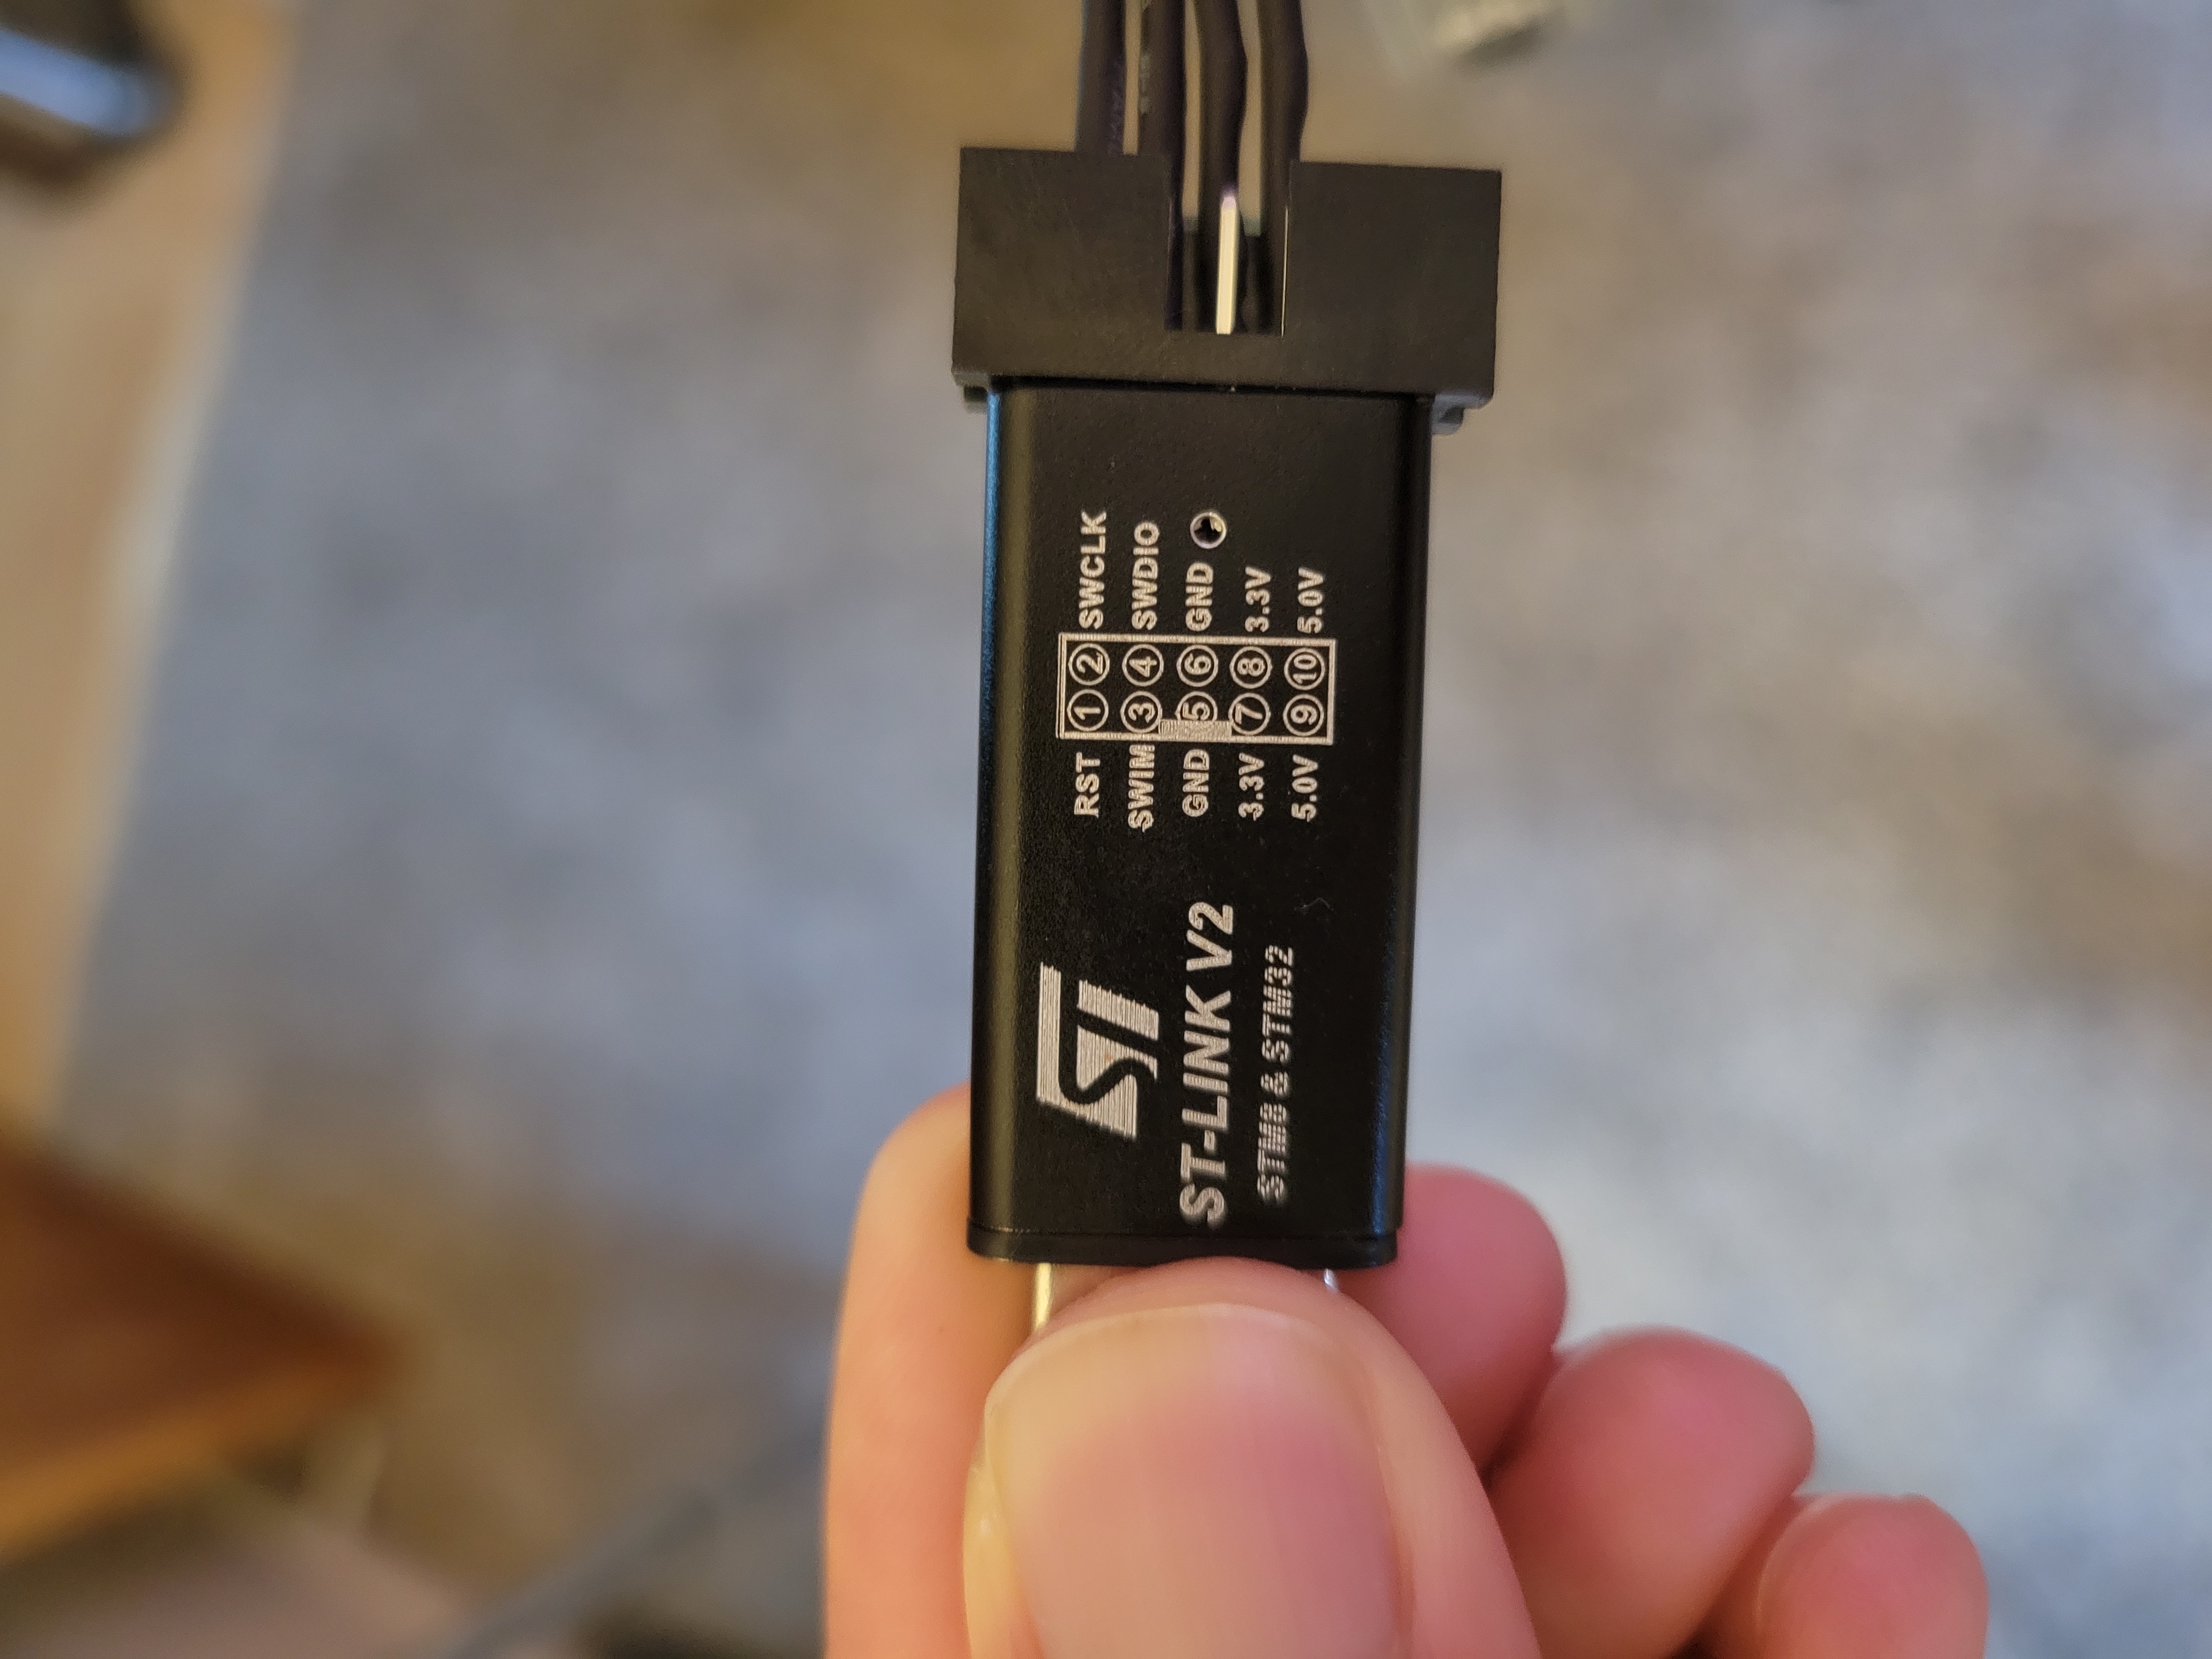
The STM32 is designed to be programmed either using a STLINK (or J-LINK), USB-to-TTL or through it’s DFU bootloader. DFU is easier, but you lose the debugging capability you would get through using the STLINK programmer. I haven’t tried USB-to-TTL so I can’t speak much on that. Below is the STLINK programmer that I used
DFU Bootloader
The STM32F411 has a DFU bootloader. Basically, it’s a bootloader built into part of the ROM which can’t be erased. The means that you can put the device into “programming mode” by holding down boot button while short-pressing reset (still holding boot), and finally letting go of boot. You can find lots of tutorials online on entering DFU mode.
If you’re planning on using PlatformIO or Arduino, then DFU mode is the way to go. It’s nice because you don’t need to buy extra hardware. If you’re going to be using the STM32CubeIDE, then DFU is a pain in the ass. With PlatformIO or Arduino, you can compile and upload. In STM32CubeIde you have to download a separate program called DfuSe to move your compiled HEX to the device. So every time you build, you have to open this program, find the hex, and wait for it to complete. Definitely get an STLINK if you’re planning on using the STM32Cubeide.
PlatformIO, Arduino or STM32CubeIde
The great thing about Arduino Framework is that it’s easy for anyone to start a new project. It also removes a lot of the hidden complexity when dealing with embedded programming. There is an Arduino Core (stm32duino) which you can download and install using either the Arduino IDE or PlatformIO. This is an excellent option if you want to stay in the Arduino Ecosystem.
PlatformIO is a powerful extension for VSC which streamlines the whole process of setting up your Arduino device. It also allows you to code in Visual Studio Code and avoid the awful Arduino IDE. Another great thing is that PlatformIO allows us not to use the Arduino framework and instead use the native STM32HAL libraries. In my brief experience, it’s a cool option, but you might find that using the STM32CubeIDE is just easier. There were a lot of workarounds that I had to do in order to get things working with the STM32HAL in PlatformIO.
I ended up using the STM32CubeIDE . It’s the official IDE from ST and is fully compatible with all of their MCUs. It’s based on eclipse, which I absolutely hate 😭😭😭. Nonetheless, the great thing about this IDE is that it incorporates CubeMAX. This is a graphical tool that will automatically generate the necessary boilerplate code when you want to do things like set a GPIO as output or setup the clock configuration.
Create New STM32Cube Project
First, let’s create a new project. You will first get to a screen to select the particular MCU that you want to develop for. ST has a lot of different processors.
Search for the STM32F411CE.
We will keep all the default settings when setting up this project.
Configuring Clock and Pins
On the next few steps, we will configure the CPU Clock to operate near it’s max of 100MHZ and also setup USB CDC.
USB CDC and Serial
If you’re coming from the Arduino world, you might be used to doing something like:
Serial.println("Hello")
The STM32F411 has three different UARTS, which is awesome. However, there is not an onboard USB-to-Serial device like you might be used to with Arduino. That USB port is not connected the same way it is on the Uno. So that leaves us two options for serial. First, we could obviously just connect a serial device to the RX/TX pins. We could also connect our own USB-to-Serial device. Or we can use the USB capabilities of the STM32 to create a virtual COM port for us. I believe it’s refereed to as the CDC class of USB. Just google search USB CDC to learn more.
Configuring Crystals
Let’s first configure the HSE (High-Speed) and LSE (Low-speed Clocks). We can go to the RCC link underneath System Core and set both of the clocks to the crystal.
By the way, if you go to WeACT studios site , it tells us about the clock information.
The board has two external oscillators. The frequency of the slow clock (LSE) is 32.768 kHz. The frequency of the main clock (HSE) is 25 MHz. The default configuration sources the system clock from the PLL, which is derived from HSE, and is set at 96MHz, which is the maximum possible frequency to achieve a stable USB clock (48MHz).
We will comeback to this when we do the clock configuration.
COnfiguring GPIO Output (Optional)
This is more of an aside, but if you wanted to blink the onboard LED you can enable the GPIO pin in this step. The onboard LED is connected to PC13. So just right-click it on the diagram and set is as GPIO_Output.
Configuring USB CDC
Go the the UDB_OTG_FS underneath connectivity and set the mode as device only.
Then go to USB_Device underneath the middleware tab and set the class as Communication Device Class (Virtual Port Com)
Setting the Clock
I paid for 100MHZ, so I want my device to run near that speed. Also, the IDE is probably warning us that our clock settings are messed up. SO let’s go to the Clock COnfiguration tab and configure it. It’s going to ask us if we want to run the automatic clock solver. We can just say no to that.
For simplicity, match your settings to the ones I have below. The main things is that I set the PLL source to the HSE, and play with the mulitpliers a bit. Remember, I can’t go beyond 48MHZ for stable USB, which will limit our clock the 96MHZ. Still good enough.
Finally, hit CRTL + S on your keyboard to save. It will prompt you to generate code. Select Yes.
Writing Code and Working with the STM32HAL
When working with the STM32 you can either use the low level libraries or the high-level abstraction libraries. For this, we are making use of the high-level. At first, this seems very daunting especially when coming from the world of Arduino. However, they aren’t that bad once you get the hang of it.
DON"T REMOVE COMMENTS
In the next section, you will see how a lot of the code is already written for you. But when you open up main.cpp you might be overwhelmed at the amount of comments there are. They are there for a reason. All of your code is mean to go between the /* USER CODE BEGIN / / USER CODE END */ . Anything written here will not get overwritten if you were to go back to CubeMAx and regenerate additional code.
A lot of the Code is written for you
If you open up your main.cpp file, you might already notice that it’s filled with a lot of code. Like I mentioned earlier, the CubeMaxIDE generates the boiler plate code you need to get things going. For example, setting up your GPIO with the right port is already done for you:
static void MX_GPIO_Init(void)
{
  GPIO_InitTypeDef GPIO_InitStruct = {0};

  /* GPIO Ports Clock Enable */
  __HAL_RCC_GPIOC_CLK_ENABLE();
  __HAL_RCC_GPIOH_CLK_ENABLE();
  __HAL_RCC_GPIOB_CLK_ENABLE();
  __HAL_RCC_GPIOA_CLK_ENABLE();

  /*Configure GPIO pin Output Level */
  HAL_GPIO_WritePin(GPIOB, GPIO_PIN_15, GPIO_PIN_RESET);

  /*Configure GPIO pin : PB15 */
  GPIO_InitStruct.Pin = GPIO_PIN_15;
  GPIO_InitStruct.Mode = GPIO_MODE_OUTPUT_PP;
  GPIO_InitStruct.Pull = GPIO_NOPULL;
  GPIO_InitStruct.Speed = GPIO_SPEED_FREQ_LOW;
  HAL_GPIO_Init(GPIOB, &GPIO_InitStruct);

}
And setting up all that clock stuff? Guess what, it’s there!
void SystemClock_Config(void)
{
  RCC_OscInitTypeDef RCC_OscInitStruct = {0};
  RCC_ClkInitTypeDef RCC_ClkInitStruct = {0};

  /** Configure the main internal regulator output voltage
  */
  __HAL_RCC_PWR_CLK_ENABLE();
  __HAL_PWR_VOLTAGESCALING_CONFIG(PWR_REGULATOR_VOLTAGE_SCALE1);
  /** Initializes the RCC Oscillators according to the specified parameters
  * in the RCC_OscInitTypeDef structure.
  */
  RCC_OscInitStruct.OscillatorType = RCC_OSCILLATORTYPE_HSE;
  RCC_OscInitStruct.HSEState = RCC_HSE_ON;
  RCC_OscInitStruct.PLL.PLLState = RCC_PLL_ON;
  RCC_OscInitStruct.PLL.PLLSource = RCC_PLLSOURCE_HSE;
  RCC_OscInitStruct.PLL.PLLM = 25;
  RCC_OscInitStruct.PLL.PLLN = 192;
  RCC_OscInitStruct.PLL.PLLP = RCC_PLLP_DIV2;
  RCC_OscInitStruct.PLL.PLLQ = 4;
  if (HAL_RCC_OscConfig(&RCC_OscInitStruct) != HAL_OK)
  {
    Error_Handler();
  }
  /** Initializes the CPU, AHB and APB buses clocks
  */
  RCC_ClkInitStruct.ClockType = RCC_CLOCKTYPE_HCLK|RCC_CLOCKTYPE_SYSCLK
                              |RCC_CLOCKTYPE_PCLK1|RCC_CLOCKTYPE_PCLK2;
  RCC_ClkInitStruct.SYSCLKSource = RCC_SYSCLKSOURCE_PLLCLK;
  RCC_ClkInitStruct.AHBCLKDivider = RCC_SYSCLK_DIV1;
  RCC_ClkInitStruct.APB1CLKDivider = RCC_HCLK_DIV2;
  RCC_ClkInitStruct.APB2CLKDivider = RCC_HCLK_DIV1;

  if (HAL_RCC_ClockConfig(&RCC_ClkInitStruct, FLASH_LATENCY_3) != HAL_OK)
  {
    Error_Handler();
  }
}
If that wasn’t enough, you might have noticed that a couple of folders called Middlewares and USB_DEVICE were added. If you peep into those files, you will come across a file named usbd_cdc.if.c. In this file there’s a function which we can call from our main called CDC_Transmit_FS. Here’s the function:
uint8_t CDC_Transmit_FS(uint8_t* Buf, uint16_t Len)
{
  uint8_t result = USBD_OK;
  /* USER CODE BEGIN 7 */
  USBD_CDC_HandleTypeDef *hcdc = (USBD_CDC_HandleTypeDef*)hUsbDeviceFS.pClassData;
  if (hcdc->TxState != 0){
    return USBD_BUSY;
  }
  USBD_CDC_SetTxBuffer(&hUsbDeviceFS, Buf, Len);
  result = USBD_CDC_TransmitPacket(&hUsbDeviceFS);
  /* USER CODE END 7 */
  return result;
}
We didn’t even have to write that! All we gotta do is go into our main.cpp and declare the function using the extern keyword. This tells our linker that this file exists somewhere else and to go and find it.
In main.cpp add the following (between the appropriate users comments):
extern uint8_t CDC_Transmit_FS(uint8_t* Buf, uint16_t Len);
Then in the main function create a variable to send:
u_int8_t buffer[] = "Hello World";
And in the loop, we will send it repeatedly with a delay:
  CDC_Transmit_FS(buffer,sizeof(buffer));
  HAL_Delay(1000);
That’s basically all we need to print “Hello World” to serial.
Flashing and Debugging
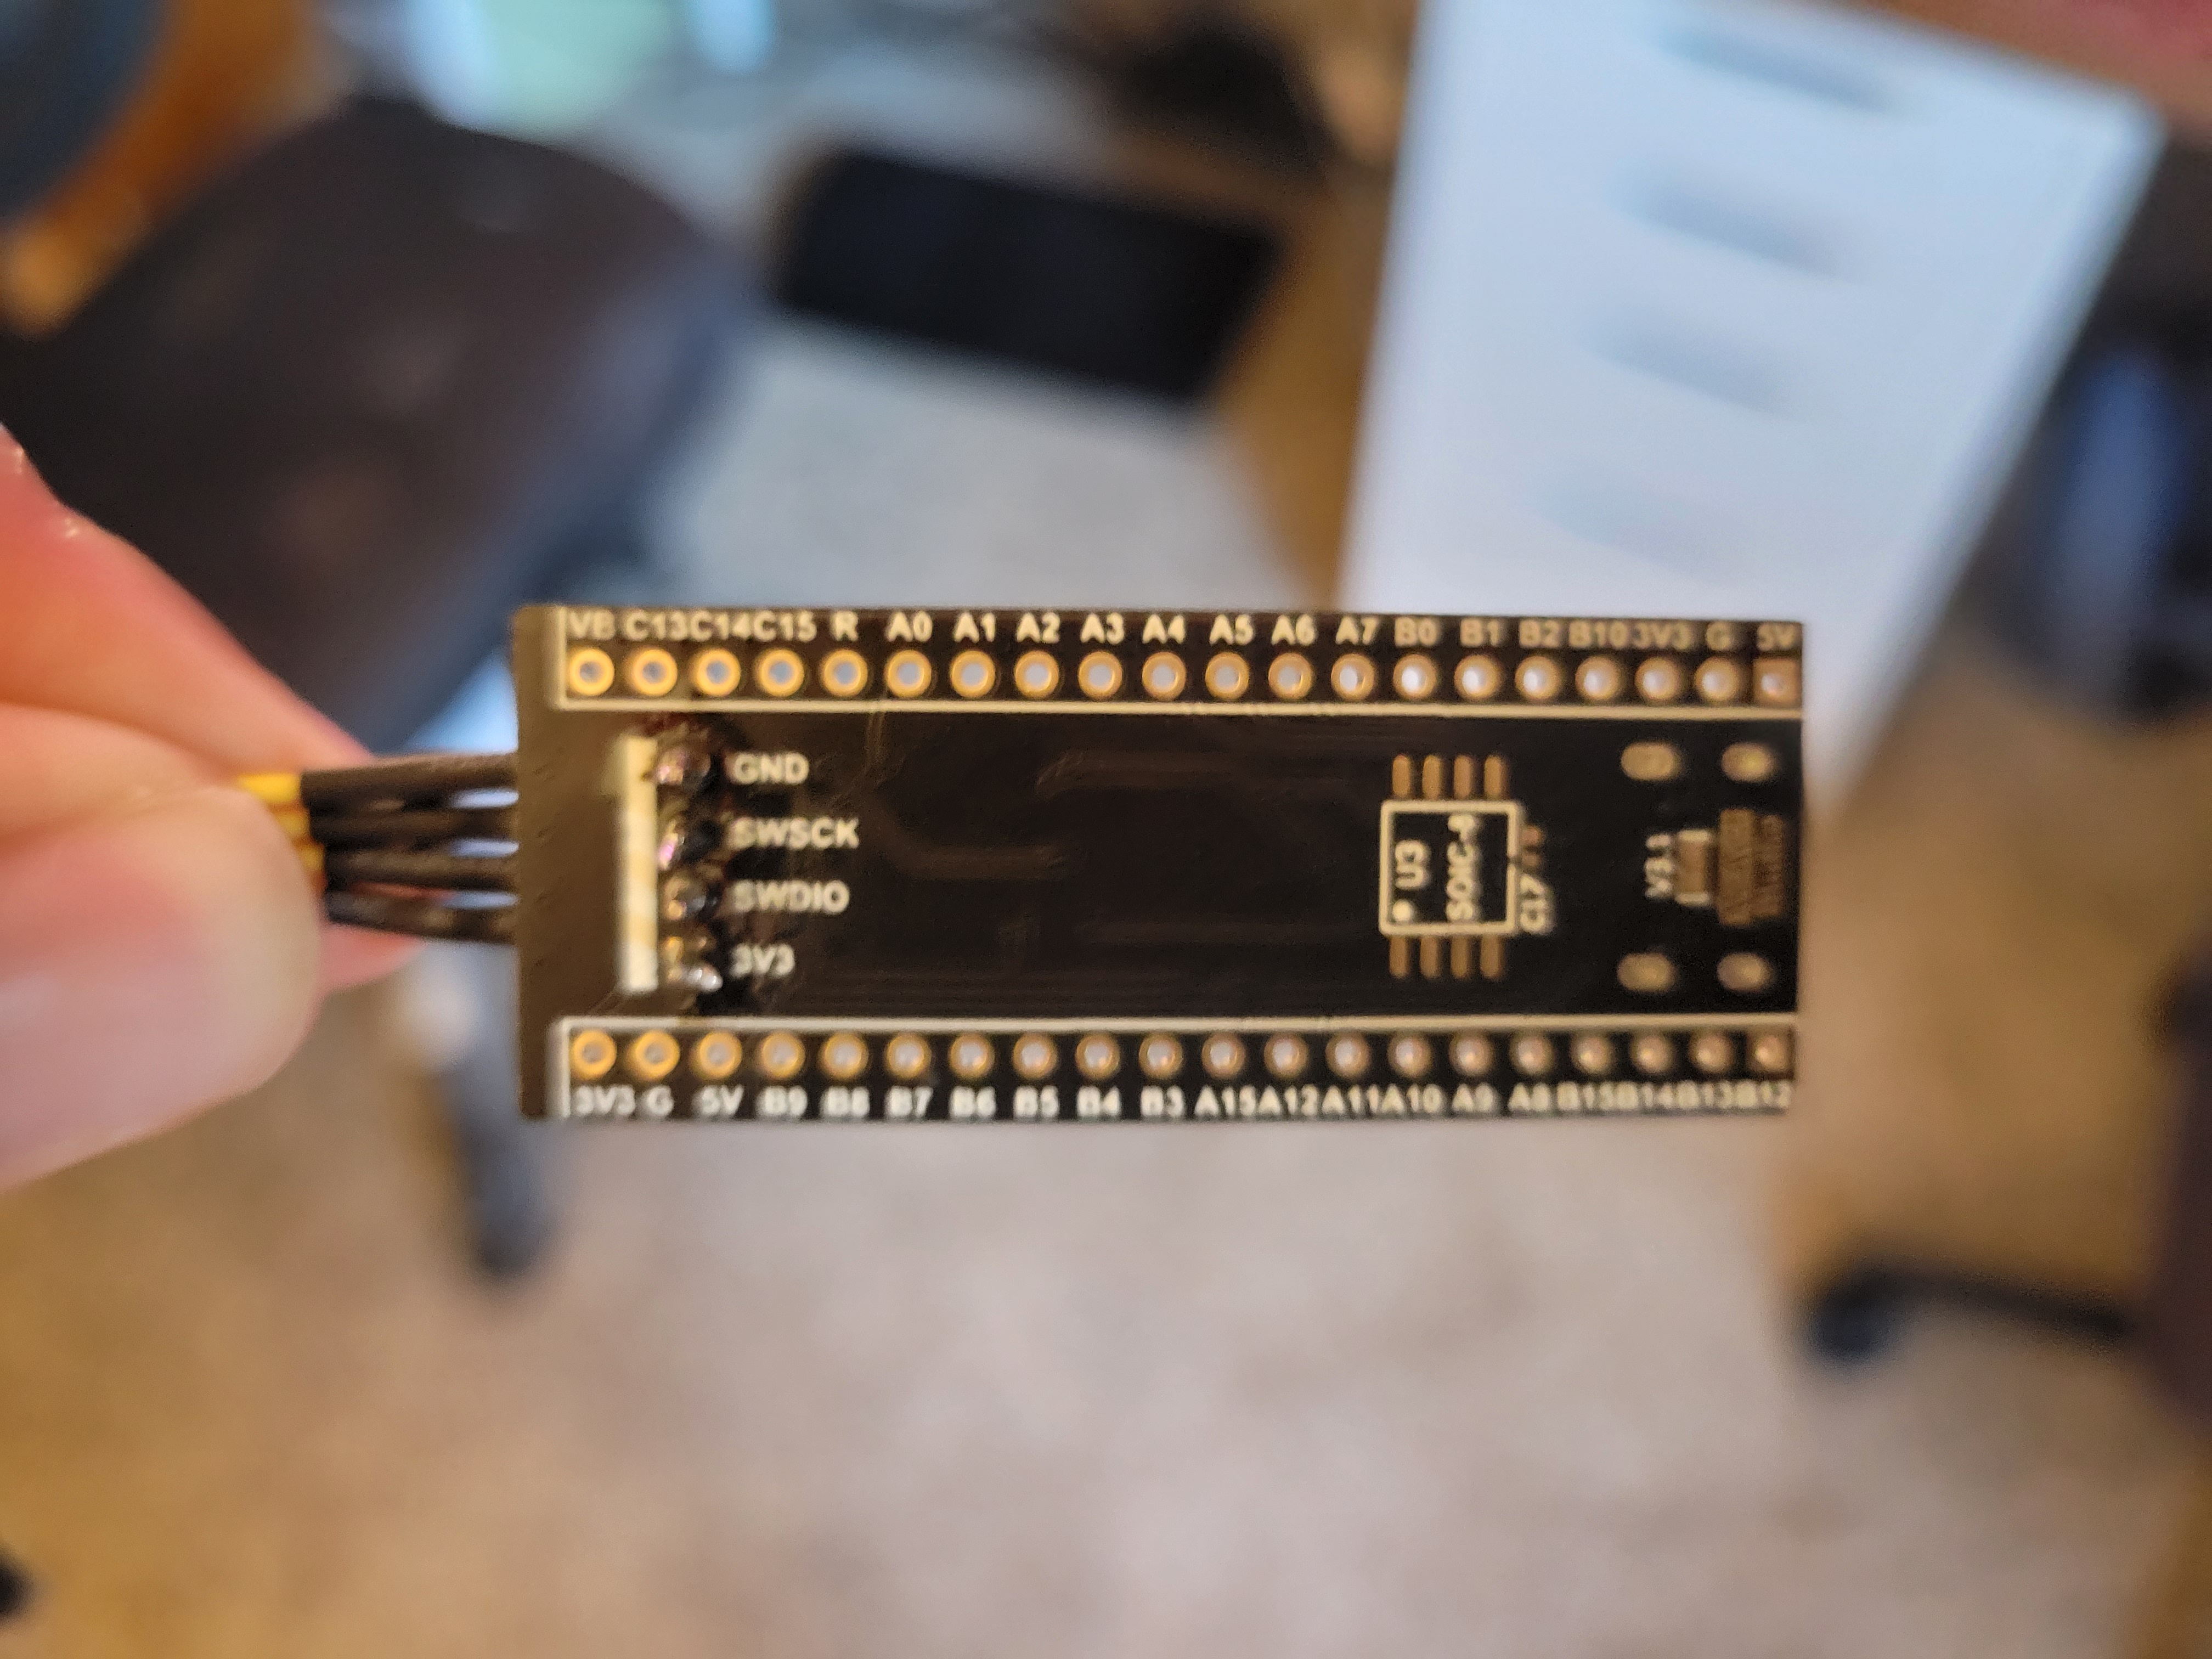
Now it’s time to flash and debug this. Connect your ST-LINK to your Blackpill, and plug it into your computer. You might have to solder on the headers if they didn’t come pre-solder. Make sure, that you get the connections correct. I wasted an hour simply because my connections weren’t right. Check with the labels underneath the board.
Setting Debug Options
In STMCubeMaxIde go to the debug configuration and set the correct settings. If it doesn’t detect your STLINK, makes sure you have the appropriate driver installed .
Debug
Once your debug configurations are setup, hit the debug options to run. You might be prompted with your firmware being out of date.
Updating STLINK Firmware
If your STLINK firmware is out of date, you will need to download the STLINK Firmware utility to update it. When you run the upgrade firmware, it will ask you to put your STLINK in DFU mode. To do that, simply unplug it from your computer and replug it in, then go to the fimrware update button.
Testing Connection
While still in the STLINK Firmware Utility, you can test the connection to your STM32 by simple going to the connect button. If you get an output with HEX values, then you know that everything is working.
Back to Debug
Okay, now try and debug again. If you still get errors about the firmware being outdated (after updating using the STLINK Utility) just ignore them. If everything goes will it should successfully write to your device.
Testing it Out
Unplug your STM32 from the STLINK and plug it into your computer using the USB port on board. Now, if we open up a serial console in Putty or anywhere else, and connect to COM6 (for me) with a Baud Rate of 9600, we should see “Hello World” being printed.
Congratulations, you wrote your first program using the STM32F411 Blackpill and STM32CubeIde.
Links: GitHUB Project


